
Easy Installation Guide for WPC Wall Cladding Panels
- Panels World
- Oct 15, 2025
- 3 min read
Our WPC Wall Cladding Panels are finally back in stock! Whether you’re a tradesperson working on an exterior project or a DIY customer upgrading your home, this step-by-step guide will help you install your panels correctly and achieve a clean, professional finish that lasts.
What Is WPC Wall Cladding?
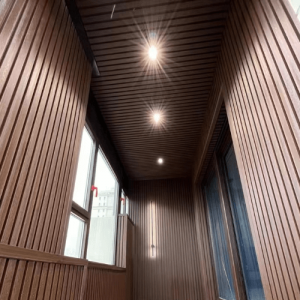
WPC (Wood Plastic Composite) wall cladding combines the look of natural timber with the strength and low maintenance of composite materials. It’s ideal for both indoor and outdoor applications—perfect for facades, verandas, feature walls, or ceiling linings.
Our WPC Wall Cladding Panels are designed for quick and simple installation, suitable for both professional installers and DIY users. Follow the steps below to achieve a clean, durable, and professional finish every time.


Materials You’ll Need
WPC Wall Cladding Panels (approximately 5 panels per metre once interlocked)
Top hat battens or treated timber battens
Decking screws (corrosion-resistant)
Drill (use a drill bit slightly larger than your screw size)
Fine-tooth saw, jigsaw, or circular saw
Circular saw setup (recommended for consistent length cuts)
Tile adhesive (for smaller wall areas or quick installations)
Step-by-Step Installation Guide
1. Preparation
Measure and mark out your installation area carefully.
For walls longer than 5 metres, add additional support using battens.
Both top hat battens (available at most hardware stores) and timber battens work well for this purpose.
2. Installing the Battens
Fix your battens vertically or horizontally depending on your panel orientation.
Maintain 500mm spacing between battens for standard applications.
In high wind areas, reduce spacing to 400mm for extra stability.
3. Pre-Drilling
Always pre-drill your screw holes using a drill bit one size larger than the screws.
This allows for natural expansion and contraction of the panels, preventing warping or cracking over time.
4. Fixing the Panels
Start from one end and make sure your first panel is perfectly level — this will set the alignment for the rest.
Use decking screws for fixing; their corrosion resistance ensures long-term durability outdoors.
Once the first panel is secured, the next panel simply clicks into place using the tongue-and-groove design.
Continue fixing one side of each subsequent panel as you move along the wall.
5. Installing with Tile Adhesive (Optional for Small Areas)
For smaller sections, such as indoor walls or decorative areas, tile adhesive can be used as a quick and effective alternative to screws.
Apply a thin, even layer of adhesive to the back of the panel and press it firmly into position.
6. Cutting the Panels
For a clean, smooth edge, use a fine-tooth saw when cutting panels.
Jigsaws, circular saws, or hand saws can all be used depending on your setup.
For multiple panels of the same length, use a circular saw with a workstation to achieve consistent results.
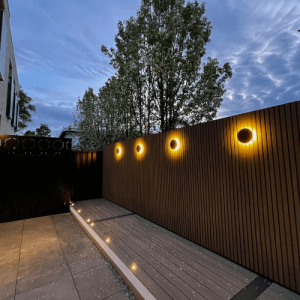
7. Where to Use WPC Panels
WPC panels are highly versatile and can be used for:
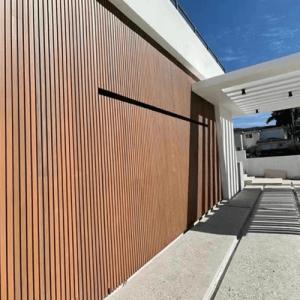
House or building façades
Fence cladding
Outdoor structures such as bin enclosures, pump covers, or screening panels
8. Aftercare
WPC panels require minimal maintenance. Simply rinse or wipe down the panels with water when they become dusty or dirty—no need for painting, sealing, or oiling.


Summary
By following these simple steps, you’ll achieve a durable, weather-resistant, and visually appealing installation. Our WPC Wall Cladding Panels are built to last and designed to make any project—from homes to outdoor structures—look modern and refined.
Information sourced from internet